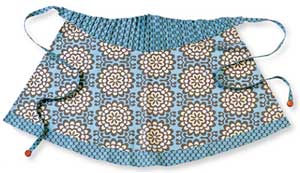
Materials:
Apron kit (fabric sheers, scissors, threads, pins, sewing needles, tape measure, sewing machine, iron and ironing board, water-soluble fabric pen, and transfer pencil)
Pattern (see download)
¾ yard (68.6 cm) of fabric for the front
¾ yard (68.6 cm) of coordinating fabric for the waistband, hem, and ties
¼ yard (22.9 cm) of batiste for the waistband lining
4 buttons (with holes, not shanks), 7⁄8-inch (2.2 cm) in diameter
Tools:
Spaghetti-strap turner
Seam gauge
You Do:
Step 1: Enlarge and cut out the pattern pieces from the project download. Cut the front out of the main fabric and the remaining pattern pieces out of the coordinating fabric. Cut the waistband out of
the batiste.
Step 2: Overlock, serge, or zigzag all the raw edges of the front and hem pieces to prevent them from fraying.
Step 3: With right sides together, pin the hem to the front, starting from the center and working toward the edges to ensure the edges match up correctly. Stitch.
Step 4: Press the seam toward the hem, and then topstitch the seam down on the right side of the fabric.
Step 5: Turn to the wrong side. Press and stitch down the sides.
Step 6: Turn back to the right side, press the hem, and stitch it down.
Step 7: Turn the four tie pieces over, wrong side up, and press one end of each, so the right side is turned over to the wrong side.
Step 8: Pin two ties together, right sides together, and stitch the sides using a ¼-inch (6 mm) seam allowance. Repeat to create the other tie.
Step 9: Turn the ties right side out using the spaghetti-strap turner, and press them. Topstitch three sides, leaving the raw edge unstitched.
Step 10: With the right sides together, pin the waistband to the waistband lining. Stitch the sides, using a ¼-inch (6 mm) seam allowance. Turn the waistband right side out and press.
Step 11: Turn in the ends of the waistband ½ inch (1.3 cm) and press. Insert the raw end of each apron strap into the ends of the waistband. Pin them in place, and topstitch the entire waistband.

Step 12: Use a temporary-ink fabric pen to mark the center of the waistband at the top and the bottom. On one side of the center, use the seam gauge to make 15 small marks at the top and the bottom edges of the waistband at 1¼-inch (3.2 cm) intervals, starting from the center and working your way out. Repeat on the other side of the center mark.

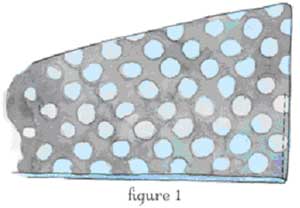
Step 13: Fold the waistband at the center, wrong sides together. Stitch a seam ¼ inch (6 mm) in from the centerfold. Work from the center out toward one end (figure 1), and then turn the waistband around, and repeat to finish the other end. Refer to the marks you made to fold each tuck at the right spot. Stitch ¼ inch (6 mm) in from the fold each time.

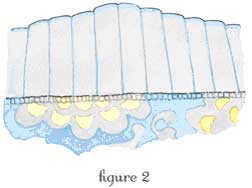
Step 14: Using a temporary-ink fabric pen, mark the center of the waistband by measuring its longest vertical length and dividing that number in half. Pin the front of the apron to the point you?¡¥ve marked. Then pin the rest of the front to the waistband, keeping it centered along the waistband (figure 2).
Step 15: Use an uneven slipstitch to sew the apron front to the waistband.
Step 16: Sandwich the end of each apron tie between two buttons, and stitch the buttons to each other. Put it on and go out for ice cream.


